Buzzings from a quilter who bumbles her way through life!

Wednesday, August 31, 2011

Free Instructions for a Scrappy Owl Block


Are you wanting an easy way to make cute little owls for a quilt, pillow, place-mat, table runner or how about a panel for a bag? I have one for you here, complete with a picture tutorial. You can make it any size you want and give each owl a different personality with easy to make eyes!
                                       Let's get started! 
1. Cut a rectangle of paper to use as a pattern. Make it any size you want, but your owl will turn out to be approximately the size of your rectangle. If you want a short, squat owl, make a short, squat rectangle. For a long, skinny one, make a long, skinny rectangle.

2. Cut the rectangle in half diagonally.
3. Flip one side over and overlap the wide end. You are preparing to make your pattern for the "face" area.
4. Fold or mark the angle make by the bottom piece. Remember, though, that you have flipped this piece to the wrong side, so flip it back over and re-mark on the right side.

5. Here it is flipped back to the right side and marked. Can you see the little "face" triangle on the right side? Make a mark on each piece so that you will know which is the right side. You will be cutting the face area from different fabric, but you may want to leave your pattern intact until you are ready to cut that piece so that you don't have to "figure out the puzzle" when it comes time to sew.
6. Cut out your pieces adding a 1/4" seam allowance. (You can cut without adding the seam allowance and your owl will be a little smaller, but that works too!)
7. Fold back the face portion and mark your fabric where you will be sewing the face on. Alternatively, you can just cut your pattern pieces apart and leave your 1/4" seam allowance.
8. Cut out your face portion from a contrasting fabric.
9. Sew this piece on to the piece you marked by putting right sides together with seam lines together and remembering that you will be flipping it up when sewn. Flip right side over and press. Trim away the fabric from behind the face area.
10. Sew the other side on. You now have the main body of the owl.
11. For the little wings, cut two small rectangles. (I discovered these were a little long. You will be able to trim off any excess, so it doesn't really matter.) The smaller your rectangles, the smaller your wings and vice versa. You may need to experiment to find a size you like with your owl.
12. Fold in half with right sides together. With the fold at the bottom, sew a 1/4" seam down one side.
13. Turn right side out and make a triangle by putting the seam down the center. Press. Trim off the excess.
14. Pin the wings to the sides of the body. (You can choose to make a different style wing and sew it into the seam here, if desired.)

15. Cut and sew border strips. The direction you press your seam will determine whether the wings flap out or in. You can do them either way. I decided my owl was a little too tall, so I cut 1" off the bottom before sewing the bottom border on.
16. The owl with borders sewn.
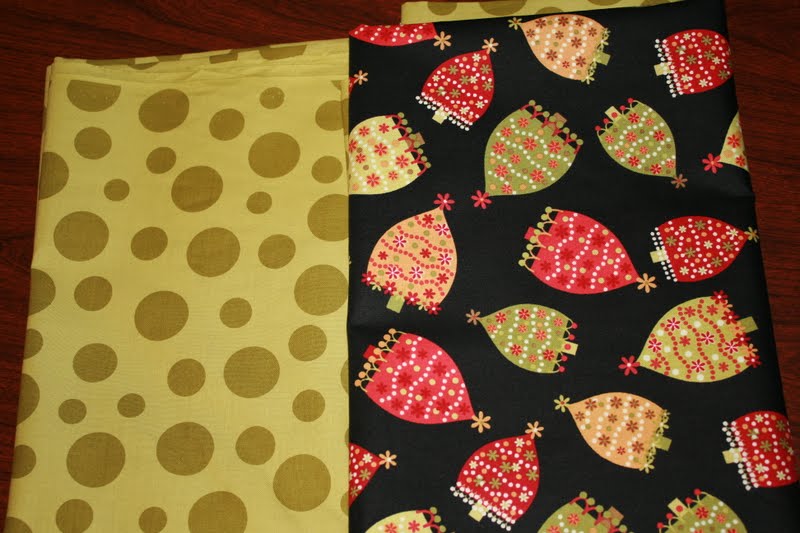
17. Now the eyes! Find scraps that have flowers, circles, dots, swirls - anything rounded. You might cut a circle out of a piece of paper the size of the eyes you think you want, and look at the patterns of the fabric through this. Flower centers make good eyes with petals radiating out from the center.
18. Trace off two circles the size you want onto the dull side of freezer paper. Press to the RIGHT side of the pattern you want. Cut out leaving a 1/8" seam allowance.
19. Using a glue stick, run a line of glue along the seam allowance on the WRONG side of the fabric circle. Pinch the seam allowance to the wrong side all the way around. Press.
                                                       The eyes will change your owl's personality!


20. Add an outer border and your owl block is finished!


                                    copyright 2011, Linda Winters, All Rights Reserved


post signature 


Saturday, August 27, 2011

National Quilt Museum and other Stops in Paducah, KY


 What a great day we had!! We started it out by going to to National Quilt Museum. We just happened to get lucky and this was Kid's Day! Free admittance. Special events. Even free ice cream! Fun! Fun! Fun!
You cannot take photos in the museum, so I can't share all the wonderful quilts with you, but you need to go! I was so inspired! Here are some of the small quilts made by school children. (photos of these were allowed)


The meeting room off the foyer has a quilt by Fraser Smith. It is entirely carved of wood!
Check out his works. They are unbelievable! Here is a little "block" that he carved so that we could photograph and feel his work.  There were two traveling exhibits there this time: Works from the Chicago school of Fusing along with guest artist Susan Else and The Nature of Design: Quilts by Cynthia Morgan and Velda Newman. Both shows were absolutely wonderful! You can stay in touch with the happenings there by going to their website: The National Quilt Museum .
 
Here you see Quilt Man (We didn't see Bobbin Boy today, although he could have been there.) He was on hand to meet and greet the kids who came through the museum today.


(Many of us are followers of Laura Wasilowski and her blog, Artfabrik. She had several works up in the traveling exhibit. It was so much fun to see them "in real life". I wanted to tell everyone around me that I had won a pair of her hand dyed socks from her blog! I restrained myself. Telling everyone that I had a pair of Laura's socks just didn't sound dignified.)

After the fun there, we went down the street to a little quilt shop called Quilter's Alley.
The staff there was very friendly and  helpful. I bought a piece of fabric that looked like "wood grain" that I needed for a commissioned quilt I will be making. This is the "oldest quilt shop in Paducah".
After this, we decided to eat lunch at a wonderful hamburger place called Willie Jaks in the little town of Metropolis. It is just across the river and is actually in Illinois, not Kentucky.) If you remember your comic books or movies, Metropolis was the home of Superman.


         So here is Superman and the statue of some guy in tights!

 After all this fun, we ended the day in a Hallmark shop where a sweet lady named Anna helped us find the perfect gifts for a couple of loved ones. It turns out she is a docent at the quilt museum when she has time. (We found the people around here extremely friendly and helpful! Thank you, Kentucky, for a great few days!)

I didn't give links last time to the other two great places I went, so here they are:  
                     Eleanor Burns Quilt in a Day of Paducah
                             and Hancock's of Paducah

              I'll be in the air tomorrow, so until next time..... 
post signature

Friday, August 26, 2011

A Trip to Paducah, Kentucky


 Do you recognize this building? It's The National Quilt Museum in Paducah, Kentucky! 
My husband was coming to this area on business and when I mentioned that Paducah is a "mecca" for quilters, he bought me a ticket!  So here I am, happy as a "tick on a hound dog". We are going to the museum tomorrow, when we have more time to browse and take it all in.


 In the meantime, since I don't have access to a car during the day, I spent quite a bit of time and money in this place! (It is almost across the street from my hotel! I was able to walk there without even breaking a sweat!) It was instant "overwhelm" when I walked in. There are rows and rows of bolts, all organized by fabric company, designer, and collection. I lugged back a bag of fabric that will replace all my husband's clothing in his carry-on suitcase! (Sorry, hon!) OH, he saw that! He suggested that I just leave my own things here and buy new! Okay!! (What a sweetheart!) I do feel rather constrained when I fly - especially now that baggage is so costly!

 Here are my fabrics.

We also stopped at Eleanor Burn's 2nd store, Quilt in a Day.  Her fabrics are only $5 a yard! Not as many fabrics, but still a lot and such a great price! I found this fun Christmas fabric. (the photo doesn't do it justice!)

We ended the day at Max's, a restaurant in the historic district near the river. I wanted to eat out on the patio to enjoy the cooler temperatures. (It's still in the 100's back in South Texas and in the 80's here!)
There is more site seeing to do before we leave, so I'll post some more soon. Until then.......


post signature


Saturday, August 20, 2011

Easy Diamond Border Tutorial


 Have you ever wanted to give a little added punch to your borders? Here is a very easy way to do just that! You can make this any size you want. If you want larger diamonds, just cut the center strip wider. Although this is more time consuming than many methods, you achieve a very pleasing result that looks much more difficult than it really is! This is actually a form of Seminole Patchwork.

1. Cut strips crosswise (from selvage to selvage) in the width you want. I have cut my outer borders 2" wide and my center strip 1 1/2". This will give me a 2" border when I'm finished and before it is sewn into any seams.
2. Now cut your strip into strips the width of the center strip (with it's seam allowance). So if you cut your center strip 1 1/2" to begin with, you will cut the strips into 1 1/2" segments.
3. Now sew these strips together, offsetting the center strip each time you sew the next strip. (Line up the 1st seam of each center strip you are sewing with the 2nd seam of the last strip you sewed.)
4. You now have a row of diamonds. You can make this as long or as short as you wish. (Although I don't have a photo of this, after making this I have decided it would be a good idea to mark and then  sew a line of "stay stitching" on the inside of your cutting line in the next step as you will be left with a very stretchy bias edge!)
5. Trim the "dog ears" off the edges and you are ready to sew this fancy border on!


 That's it! Easy, right? Just imagine how this little border can dress up and frame even a very simple little Nine Patch. Keep it in mind the next time you are trying to decide on a border. Imagine the center diamonds in different scraps! (Just make many strips with different center fabrics and mix them all up when you cut.) 
Until next time.....


post signature


Sunday, August 14, 2011

Saying Goodbye to a Special Person!

In Memorium


Irene Laden Duncan August 16, 1908 - February 25, 2015
Aged 106

I'm reprinting this post from 2011. I have edited it a little to be more current. It is a tribute to my grandmother who passed away yesterday at aged 106.

Me on the left, my grandmama in the middle, and my sister on the left. (She would probably not be pleased that I posted a photo in which she was not "fixed up".  This photo was taken in 2011.

My love of quilts began with this sweet lady, my grandmama.
My grandmother was born in 1908 as a twin. This is her on the left and her twin on the right. They were named Irene (my grandmother) and Pauline (my aunt). 
This is a picture of a photo that was sitting on her dresser.As a young woman, my grandmother's twin eloped. Their daddy, who was a little harsh, was so afraid she would also elope, he nailed her windows shut and locked her in at night. She eloped anyway when, after a church service, the sympathetic preacher called her in to talk to her and performed a marriage ceremony right then and there! She and my granddaddy left in the preacher's wagon!   Again, my grandmother is on the left and her twin on the right. (She was slim all her life!)

    Her "world famous" chocolate cake recipe  can be found here.
           

It is the fudgiest cake you will ever hope to find! Her story of this cake can be found at the link above.  

My grandmother had "spunk". She once chased a burglar out of the house with the broom to protect her babies! (She had three sons.) 
Her purse always smelled like juicy fruit gum and she always had embroidered handkerchiefs that she knotted into "hanky babies" during the sermon (to entertain my sister and I). She also showed us how to make carnations out of Kleenex tissues and a pipe cleaner. We made carnations until we sat in a pile of torn tissue edges!
Her popcorn was the best I've ever had. She made it in a big heavy pan and used butter instead of oil. The butter browned as the popcorn popped, so it had a wonderful flavor!
And this is a peak at the quilt that started my interest in quilting. It's a Little Dutch Girl quilt that my grandmother made. The little socks and ribbons at the back of her neck have been carefully colored in with something (I am guessing crayon) to make them match the dress. I used to pretend the sashing was a road. I would go "visit" each little girl on the quilt by driving along the road and turning into their block. I was a little shocked that her panties were showing as the wind lifted her dress. I wanted to grow up and make a quilt just like that! Sadly, I haven't done that yet, but if I can just live as long as my grandmother did, there is still time! 

Grandmama, We love you!


Related Posts Plugin for WordPress, Blogger...