Buzzings from a quilter who bumbles her way through life!

Monday, January 30, 2012

Using Those Scraps!


Back in the summer, I won these trimmings from Kate Spain and the line she had coming out at the time. I put them aside, ready to use them in my applique and piecing. They are strips between an inch wide all the way to about 6inches wide, and not enough of any one color to do standard blocks. I decided to start some scrappy blocks using the same method I use for piecing the backs of my quilts, only small enough for blocks.
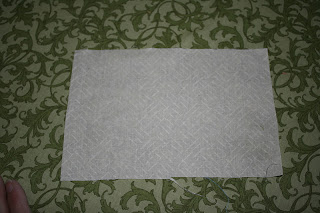
 I started out by cutting a wide piece about 9" long (you can use any size you want) and evened up the sides. I also cut a couple of pieces from the narrow strips.

I cut one strip down the center and sewed it to each side of the other strip. Then I cut the larger block in half lengthwise, making the cut at the side and not the center.

I sewed the strip between the two sections of the block.


You can either stop here, or cut the block into two more sections by cutting widthwise and inserting another strip like the first. There is no reason your blocks all have to be the same, but try to carry one color over into each block to tie them all together.

Here are a few of the blocks I've made from my little treasure pile of scraps. Notice that some are very simple and others have more piecing. If a block is not quite large enough, simply add more strips either on the edge of in the middle of the block. It couldn't be more simple. Trim all the blocks the same size or have some large and some small. Mine are all 6" x 9". You can see by the arrangement that I will be able to add little "pops" of color in the areas where the blocks don't come together. 
This seems to be a year that many of us have chosen to use up as many of our scraps as we can. What a wonderful challenge! I'm going to see if I can turn these into something useful as well as beautiful!
                                                                           post signature


Friday, January 27, 2012

Depression Era Quilt Top?


My husband's sweet cousins (thank you, DD and Linda!) found this pretty quilt top at an estate sale and put it aside for me. It has the characteristic "bubble gum" pink of the Depression era and many of the fabrics in the Dresden plate design appear to be from flour or feed sacks. 
 Although the sashing is machine sewn, the Dresden plate design is sewn with hand stitching. 
I am going to set this aside for a little while and really think about how it should be quilted. I wish there had been a little tag along with it telling who made it. I imagine the hours and hours put into it. I tend to make up my own back story if I haven't been given one, so I imagine some little Texas grandmother sewing these blocks while sitting on the porch in a rocking chair. (She had to get out of the stifling hot house on those summer days, so she sat in the shade with a breeze on her face.) As she pulled out each little carefully cut shape, she thought about where she got the fabric. It might have started out as a flour sack or a sack of chicken feed. It probably was made into a little child's romper before being put aside to be cut up for quilt fabric. The same hands that sewed these designs so carefully, also shelled peas and shucked corn. She kneaded bread at least once a week and often thrilled the "men folk" with her pies. She always wore an apron and spent many hours hanging the laundry on a line outside the kitchen door.  Her babies were born at home and a few of them died there. When her sons marched off to war, she waited weeks and sometimes months to hear from them, each day with a prayer for their safe return. She was "soft as a kitten" and "tough as nails". How sad that her family didn't think of all this when they decided this top was not something they wanted to keep. 
This makes me want to finish all my UFO's and get labels on them!  I think I may put a note on each one of them, telling a little about why I started it and maybe even why I didn't finish! 
post signature

Thursday, January 26, 2012

Ultra-Absorbant Bib with a Cupped Bottom - tutorial


Now, you are either going to think I'm clever or crazy, but I came up with this bib that's protective enough to use with an adult as well as a toddler. 
I went to the store with the intention of buying some inexpensive bibs to alter and embellish. I didn't find any I liked, but I did notice that most were made a lot like a washcloth with a neck cut out. SO......like a good little crafter, I went to the washcloth aisle and started looking at the selections. I happened to notice that there was something on that aisle that was already shaped like a bib, but with a few differences. It was ...........


...made to fit on a toilet lid. The thing I liked about it was that it had a wonderful, soft texture and a rubberized backing that would prevent leak- throughs.

1. Place the cover on a large piece of paper. I found it helpful to put this all on a carpet and to pin it down around the middle to hold it in place. Stretch out each edge and trace it off to make a pattern.
2. Cut out your pattern and make a neckhole at the top. You might need to taper the edges toward the top also. I left only the elastic at the bottom of the bib and cut off the elastic from the top 2/3 of each side.
3. Cut a fleece lining, making it about 1/2" larger all the way around.
4. Pin the lining to the bib, putting right sides together. Sew around the outer edge. Leave the neckline open.
5. Cut a 20" x 3" strip of the fleece. Center it on the neckline and sew one edge of the fleece to the neckline. (It will hang over at the ends.) Finish off the extended ends by folding the right sides together and sewing across the ends and down the side until you get to the neckline. Turn right sides out. Then turn the raw edge along the neckline under and sew it down.
6. Sew hook and loop tape to each end of the extension. 

You may need to manipulate the edge of the bib a little to make it cup upward. You may even want to sew it in place. This is a heavy duty bib! Guaranteed to catch messy drips and little ones love the texture!

post signature

Monday, January 23, 2012

Valentine Booklet Tutorial


Here's a sweet little idea for you to make using scraps, cardboard, and paper. The verse reads: 
Roses are red, Violets are blue.
Here are some things I love about you!
(You can then use the remaining pages to list the things you love about the recipient. Maybe you can even use some photos!)
This is a very easy project. Here's the tute:

1. Cut two heart shapes from cardboard. (You can use a cookie cutter for a pattern or cut one from paper first.) 
     2. Trace the hearts onto the wrong side of your fabric scrap, leaving about 1/2" allowance around the edges.

         3. Cut out the fabric hearts on the seam allowance. Clip almost to the line on the curved edges.

4. Use a permanent glue stick to glue the seam allowance over the edge of the cardboard heart. Make two. These are your covers. On the front cover, leave about 1 1/2" open for stuffing.

5. Use a craft stick to stuff a small amount of fiberfill under the fabric on the front cover to slightly puff it. After you get it the way you like it, glue the open edge closed.
6. Cut two hearts from felt. Glue the felt to the back of each cover to hide the turned over seam allowance.
7. Print out or write your chosen verse and cut your pages from paper.  Stack them up and trim to fit inside the booklet.
8. There are probably many ways to bind your book, but this is a very easy way. I simply took several strands of embroidery floss and sewed through the book at the top of each curve of the heart, making loops. Be sure you test whether of not your book will open. You need to leave the loops loose. I suspect a couple of jewelry rings would work better, but I didn't have any on hand. A very narrow ribbon might also work well. 
I chose to glue a few sequins on the top. A silk flower, embroidery, applique, or even nothing at all could be used. Now fill the pages with the things you love about the recipient - their sweet smiles, their thoughtful nature, the way they listen........etc. 
NOTE: Here is an alternate method of binding the pages together. Simply fold your fabric in half before cutting and place one edge of the heart at the fold. When you turn the edges, you will be turning one piece of fabric over 2 cardboard hearts (see the photo above). Cut your paper with the fold at the edge also, then sew down the middle (on your sewing machine) to connect all the pages. Instead of gluing felt over the cardboard cover backs, you will glue the first and last page of the paper to the front and back, as shown below.


You could also use this idea for a little booklet of inspirational thoughts or uplifting scriptures. Use your imagination! There's no reason the shape has to be a heart. You could use any shape that you can cut out and turn your fabric over.  It doesn't even have to be a Valentine. It could be a fun little autograph book for a little girl, or a book of coupons for Mother's Day, tiny watercolored sketches or even a Get Well gift for someone who needs it. 

Have fun, and .....
post signature

Monday, January 16, 2012

My Very First Quilt Tops - 33 years ago


I was looking through my UFO box this morning and came across my two oldest "unfinished objects". 
When my two oldest sons were very young (about 2 yrs. and 4 yrs. old) I attempted to make quilt tops for them.
 
Quilting was not yet a popular thing in the late 70's. I didn't know anyone who quilted except my husband's aunt. She didn't live nearby, so I couldn't go to her for advice. AND, machine quilting wasn't acceptable at this point. You mailed off your top to someone who would hand quilt it for you and mail it back. I couldn't afford to do that at this point in my life, so they stayed unquilted.
 
I didn't have a pattern or even a book to tell me how to sew a quilt top, so I just came up with my own designs and dove in. I did have a couple of quilts passed down to me, so I knew most quilts had blocks and sashing (although I had no idea of the terminology). The fabric available then was a polyester/cotton blend, so that's what I used along with scraps I had been given.

I had no idea of the things to really watch out for when putting my top together. I didn't know what made a quilt top neat and nicely sewn. 


Now I know that my blocks and sashing should line up!


my poor little fish is upside down, but that's not the worst of his problems!


My blocks should be the same size!

And I know now to not cut the points off my triangles!


Despite these problems that seem so obvious now, I put these unquilted tops on my boy's beds and let them enjoy them. They have a few spots and stains and I had to repair several seams. 

Now......do I quilt them in their current condition or take them apart and rework them before quilting? The "persnickety" among you will say "REWORK", but could it be the true value of these sad little quilt tops is that a young mother made an attempt to provide something special for her little boys despite her limitations? Would reworking them destroy the evidence of that? I'll have to think about this one - maybe for another 33 years!
post signature

Thursday, January 12, 2012

New Quilt - I Won't be Afraid


Do you know of someone who is going through a tough time - surgery, chemo, life changes? Or how about a child who is afraid of the dark? Or maybe you need something inspirational for a prayer room wall at church. This quilt is made to comfort. The verse on it reads "When I am afraid, I will trust in you. In God, whose word I praise. In God I trust; I will not be afraid. Psalm 56: 3,4"

I used string blocks as my border. In fact, as I laid them out to photograph for my last post, I started thinking of ways to use them in a border. I ended up using a foundation strip the size and length of my borders instead of blocks. I machine quilted along each seam in the border, which gives a very nice texture.. It is quilted in swirls and pebbles around the raised circles. The backing is a soft, cream fleece.

 I have worked non-stop on finishing it. My fingers are sore, but I like the results. This photo doesn't really do the texture of the quilt justice. (I will have it in pattern form within the month. If you are interested in pre-ordering it, just email me for details.)
For me, this verse is a good verse to start the new year on. I am not facing adversity right now, but what great things could I do if I did not let fear get in the way? 
post signature

Monday, January 9, 2012

Waste Not, Want Not!


Have you ever thought about how much money you throw away when you throw out those little scraps? If you weigh one yard of fabric you will find that it weighs an average (depending on the fabric, of course) of 5 ounces. That means that if you pay $10 a yard you are paying $2 an ounce. My scrap pile above weighs 7 1/2 oz., so I would be throwing away about $15 worth of fabric. Hmmm..........I must say that this is a very small portion of my scraps!!I have four bins stuffed to brimming with scraps of all sizes. I weighed the fabric in one bin at 8 lbs. The fabric in that one bin alone has fabric worth at least $256! Remember I have 4 of them. I don't want to even think about how much I've spent on fabric in the past!  I want to use up every tiny bit of fabric I can. It is the "green" thing to do, after all. (There is a point, of course, where you need to just give those scraps away or throw them away. I don't promote hoarding!)  I decided to make a string quilt. Our quilting great grandmothers used this method often to use up scraps and provide warming quilts for their family. Most of you probably know how to make one, but there are still some of you out there who don't know how simple it is. You can make blocks any size depending on the size of your scraps. String blocks are good if you have a lot of long narrow scraps. Here is one I made a few years ago. Absolutely everything, including batting, was scrap. I used a leopard print silky fleece left over from pillows for the backing. It is large enough to curl up in while watching television.


 You can make these either with or without a foundation to "build" on.  For a foundation you could use scraps or inexpensive muslin. Actually, my husband's aunt used newspaper. She tore it off after all blocks were sewn together.  (Another opportunity to recycle.)
Start by placing the first strip right side up at the edge of the foundation (your muslin or newspaper). If you're not using a foundation, you will just sew each strip to the next.
Place the second strip right sides together matching the edges. Sew this using a 1/8" seam at the edge.
Flip this piece over and press. Continue by adding each successive piece just as you did this one until you have covered your foundation. You can keep your strips uniformly straight, or let them become "wonky". 
Here are a couple of finished blocks. I think I will start putting all my strips from cutting in a bin dedicated to strips. These could made great "piano key" borders or just string quilts. This might even make a nice project for someone just learning to sew. You don't have to worry about grainline when you have a foundation. Until next time....
post signature

Thursday, January 5, 2012

A Toy Light Box that Works!


I've found a great little light box and it was in the toy section! It cost less than $20 and is large enough for 8 1/2" x 11" pages. It is made by Crayola and is called the "Light Up Tracing Desk". It's light and portable and would be easy to take on a retreat or to a class.


I will pass the stickers and princess pages on to someone who will appreciate them.


Here is the little light box, complete with a handle for easy carrying. The Disney Princess sticker in the bottom corner can be removed, but since my sister claims that my husband treats me like a princess, I will leave mine where it is! 


You may want to give this a try. You might even find it on sale since the holidays are over. It's so easy to use, a child can do it!
post signature
Related Posts Plugin for WordPress, Blogger...