Buzzings from a quilter who bumbles her way through life!

Thursday, March 29, 2012

My Sister, Darla, and Her Fabric Designs

One of the little bags made from Darla's submitted Design a Bag pattern
My sister, Darla, is guest blogging here today. She is only 3 1/2 years younger than me, and living only 4 miles away. What adventures we would have if we were rich and retired! She has recently gotten "hooked" on Spoonflower. See what she has to say about it and be sure to go to Spoonflower and vote! I'm voting for her!!!

 I guess it was inevitable that I would get into fabric design.   Some of my earliest memories are of Linda and me playing at our mother’s feet while her machine was humming along.  I can remember when she got her “new” Kenmore sewing machine.  She was so proud of it.  She made us Poodle skirts and petticoats.  Well, that was back in the 50’s.
You can just imagine growing up with Linda as your older sister.  She was prettier, she was smarter and she had all the talents and she had boobs!…and in case, you don’t know it; Linda means beautiful and Darla doesn’t mean anything.  So that is where I am coming from. (Note from Linda! This is totally untrue! All of it, except the meaning of our names!)
Darla on left, Linda on right (about ages 6 and 9)
My fabric design Crafty Ladies (that is Linda and me)
I did finally outgrow my complex and overcame my shyness and even decided to try my hand at art.  In fact, I got my bachelors degree in Fine Arts with a concentration in drawing.  Then I got certified in Secondary Art and have been teaching for nearly 20 years. (She also got a Master's degree in Informational Technology, so she is my go-to person for anything computer related. It is SO easy for her!)
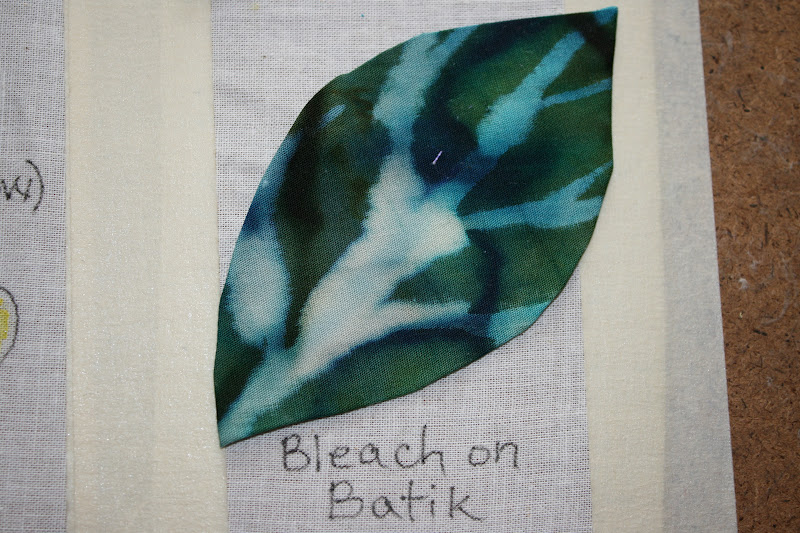
I love what I do but I am guilty of moaning and complaining a little about not having time to do it all those cool things Linda is doing.  Linda’s passion is quilting and she is really good at it but her true passion is in the creation of the quilts.  When I began to learn how to do watercolor I was hooked and painting became my passion.  Now years later on the threshold of retirement I can envision having some time to be more creative.  In the last year or so Linda  has mentioned the Spoonflower website, a site for independent fabric designers to upload their designs to make fabric. Recently, Linda mentioned it at exactly the right moment and I went exploring.  I uploaded a drawing I had done as a demonstration for my high school art students, not one I had ever intended to make into fabric so it was just an adventure to me. 
It arrived in the mail!!!  You know, something happens to you when you see your design on a piece of fabric...I carried it around with me.  I stopped people on the street, in parking lots, took it to school with me, showed it to all of my students…I was beyond excited!  But fabric design is not just like painting in watercolor.  There is more to know and luckily I have technical skills in Photoshop.  I purchased A Field Guide to Fabric Design by Kimberly Kight and set out to make designs with fabric in mind.  In fact, when Linda suggested I be her guest blogger I had already thought about asking if she would like me to be.  You see, sisters support each other like a good bra. 
My entry for the contest
(The fabric is printed in the shape of the pattern. How easy is that! -Linda)
Spoonflower sponsors weekly contests. Tuesday was the deadline to enter a design-a-bag contest.  I thought about the bag and had no time to work on it.  During church Sunday morning I looked down at my purse, and an idea hit me….I know, Squirrel!  I got distracted!  By Monday afternoon, I had it planned, drawn out and all that was left was to make up the prototype.  Linda and I had coffee together and I made up the purse in less than an hour and that included the rip out time when I did not ease in the bias on the corner.  I think I inspired her last blog.

 So go, explore Spoonflower.com and while you are there take a look at the bag contest.  My bag will be the purple one shown here.  Feel free to pick your favorites and cast a vote.  Read the directions on Spoonflower for how to cast your vote.  You may vote for as many as you would like. 


One of the features Spoonflower offers is a shop for the designers which can make the fabric available to the public.  Check out my shop.   I don't sleep anymore.  I sneak downstairs and design!


So this is what all the fun is about!

Thanks,  for hosting me, Linda.  I owe you!
 (Hmmm.......that's tempting!)
(Darla on left, Linda on right) Christmas morning
post signature

Tuesday, March 27, 2012

Binding on Curves Without Cupping


binding on left is cupped, on right is flat
If you are not very experienced with sewing binding on curves or scallops, you may find that despite your efforts to sew perfect 1/4" seams, you can end up with a "cupped" scallop. There is a little trick to preventing this. 

First of all, you need a little tool. It doesn't have to be just like mine, but it does need to be something firm enough to hold down your binding and thin enough to slip under the presser foot if needed. I use a little wooden "spork" that I kept after getting a tasting sample in the grocery store. I also have one I made out of a craft stick. I suspect an old credit card with a notch cut in it might work, but I haven't tried that.
 Here is the tip. As you sew around the curve, use the tool to hold the seam line flat as you allow the outside of the binding to slightly ruffle. This puts some "ease" into your binding and will allow it to easily turn over the raw edges without cupping. (If you are VERY new to this, you will notice that the binding is folded in half and the raw edges are aligned with the raw edges of the quilt. Then when you turn it over the raw edge, you have a fold to sew down.)
That's all there is to it! Easy, unless you were never told to do this! I hope you find this helpful. Sometimes those of us who have more experience at these things forget to mention these little tricks. I have given away several quilts with cupped scallops. I tried ironing them into submission, but that only works temporarily. 
Happy quilting or sewing, and until next time......
post signature

Thursday, March 22, 2012

Unusual Ways to Incorporate Ribbon


I love to use ribbon in my quilts. If you're here from Sew We Quilt, I want to welcome you! If not, you can find a table runner tutorial there that uses the carrots above along with a little rabbit face. 
 I often use ribbon to accent a border or add a punch of color as in the borders of these quilts:
Halloween Skeleton
Jesus Loves the Little Children
 There are other ways to use ribbon. It can become part of the design as in the tops of the carrots above. Or how about a......

fish, or a....
stylized flower, or even a.....
chicken or other bird.
Ribbons make great "tassels" at the bottom of wall hangings, too. 

The ribbons in my Irish Blessings quilt form the petals of the flowers. 
I hope that the next time you see a beautiful spool of ribbon, you'll think about how you might use it in a creative way. It can do more than tie a package or adorn a pig tail! 
Until next time...
post signature

Tuesday, March 20, 2012

Quilting with a Chihuahua.....or not!


If you've read my posts for very long, you've seen Fiona, the neighbor's dog, in several photos. She has worn a trail across my yard from hers and joins me any time I am outside. 
The neighbor has decided to give her away and my son is going to take her. He lives in another state and will take her home after his visit during Easter. She will have doggy sisters there to play with and keep her entertained. In the meantime, I am dogsitting. It has been a very long time since I've had a pet and I've never had a house dog. Having her here is a lot like having a 2 year old child! She wants constant attention and jumps in my lap any time I sit. She begs with big sad eyes if I have even a coffee cup in my hand and jumps at it dangerously.

 She sneaks big wet kisses when you least expect it and brings her favorite toy to put in your hand in hopes of play. (I do take time to play with her, so she's not neglected.)
I've learned that anything left out is fair game with her. She has already chewed up...... a spool of thread that she cleverly pulled off the coffee table with her paw (luckily she didn't eat any of the spool or the thread),
 a pin cushion full of crushed walnut shells (awful mess!) and a piece of my blue jeans!

Her dog bone "chews" are safely hidden away in my couch cushions.
 On the plus side, she is so excited to see me when I come in that her tail almost wags her! She sleeps between my husband and me curled up in a little ball, all warm and snuggly. If I move, she moves with me to cuddle closer.
 I have a quilt to baste that I don't dare lay out because she will be in the middle of it. Here is a sneak peak at part of it:
I will also soon have more tutorials up for you to see.
Join me on Thursday, March 22, when I post ideas for incorporating ribbon into your quilts in unusual ways. I will be guest hosting at  Sew We Quilt that day with a tutorial for a table runner using one of those ideas. Be sure and visit both of us then! (I will be back to normal very soon. Please stay with me! This is the busiest time of my business year.)
Until Thursday............
post signature

Monday, March 12, 2012

Potato Masher Texturing - Tutorial


I'll just bet most of you would never have considered this lowly potato masher a quilting tool, but it can be!


 This loopy texture was achieved using the potato masher above.
Now, it doesn't really have to be a potato masher. It can be a cake rack, a wire basket, anything that is heat resistant and that has holes that cloth can be poked through. 
You also need either iron-on interfacing, or some type of iron-on material that can reinforce your fabric.
 Place the RIGHT side of the fabric down over the holes of whatever you are using. Use a chop stick, bamboo skewer, crochet hook, or anything narrow enough to push the fabric through the holes. Try to keep them as even as possible, but don't obsess over it. Start in the middle and work your way out.
When you have your area finished, you are ready to reinforce the back.
 If you are using iron-on interfacing (where only one side will adhere to the fabric), simply cut out enough to cover the area you have textured. If using a material that will adhere on both sides, first iron it to a piece of fabric, peel off the backing, and be prepared to iron it to the textured area. 
 Place your iron-on on the back of the potato masher and iron it on!
Gently remove your textured piece.
Here is a sample on a baking rack. I think this was easier to use than the potato masher because the spaces between the holes are only the width of a wire. The fabric "loops" didn't tend to crawl out when I did the holes next to them. 
I chose to sew between the loops when I finished to be sure they stayed in place. You can do this by hand or machine. 
 Have fun and look around the house and garage with an eye for a "texturizer"! Don't have a potato masher? Your baking rack doesn't have a grid? How about hardware cloth, chicken wire, the back of a patio chair or top of a patio table, ..........
 I used my textured cloth as a center for the flower on this tote bag. This can be a lot of fun, so keep your eyes open and, until next time..... 
post signature

Tuesday, March 6, 2012

Adding Color and Texture to Details in Your Quilt

I have been busy getting a program together for my quilt guild on adding detail with color. The subject came up when one of the members needed to add shadows to a small applique on her wall hanging. She asked me how she could do that. 
There are so many ways to do that, when I started naming them, she asked if I would just give a short program on it. I thought maybe some of my readers might want to know some of these tricks, too. None of these are new. Some were used in quilts during the Depression!
 The bird appliqued above is on a Hansel and Gretel quilt that I made a few years ago. The fabric used for wings, body and head are all different, but chosen to give the correct color and texture for this bird. Embroidery stitches are added to the throat, breast and tail. Embroidery, either machine or hand done, is the first method you might think of for giving color and texture to a quilt. Hollis Chatelaine (a quilt artist in North Carolina) does gorgeous work using different colored threads to color the figures in her quilts. 
As mentioned above, fabric can also be chosen to add just the right texture and color. I collect fat quarters in different patterns that suggest texture to me. Here is a quick sampling of just a very few out of my "texture" box.


 You wouldn't consider the items in the picture above to be quilting tools, but they can be! If the detail you want is too small to applique, or you need something more IN your applique, remember these.

First, there is plain old crayon. Don't use washable crayon, or it will wash out. I use Crayola brand, because it has more dye and less wax than cheaper brands. Always heat set it with your iron. (My grandmother made a quilt before I was born that had little Dutch girls with socks colored to match the dresses. She used crayon to color the socks.)


Colored marker (again, NOT washable) can be used to fill in color or add details.


Colored pencil works well, but is not as permanent as crayon or marker. It works well for wall hangings that will not be washed.


Paintstiks (by Shiva) are what I use for adding a rosy glow to skin tones, but they come in many colors. You first color them on something like a piece of foil and pick up the paint with a dry brush. I use a small stencil brush with fairly stiff bristles. I have a tutorial for using Paintstiks for faces on your quilts here.


 Here I've used fabric dye for the yellow and acrylic paint for the black. Either of these can be used. ( The link above for using Paintstiks also deals with acrylic paint.)


Stippling with a fine tipped permanent ink can give details like the veins in a leaf, shadows at the edge of a ball, etc. 


Although it doesn't show up as well as I would like in this photo, you can use the wrong side of a fabric to give the illusion of light. Half of this leaf is the reverse of the fabric.


The veins and lighter side in this leaf are drawn on with crayon. Quilting over it will give it further definition.


 Regular household bleach can be brushed on but always test this first. Some fabrics bleach out to unexpected colors and some do not bleach out at all. The bleach is difficult to control, so don't use this where you need precise fine lines. Wash the bleach out well when finished! You might be interested in seeing a tutorial and more ideas for using this technique here .


 One more idea is the use of beads. You must add them AFTER you quilt because you don't want to hit a bead with your needle. 

I'm sure there are methods I have failed to mention, but these are all tried and true.  The next time you need a little touch of color or a little detail, see if one of these will help you out.

Until next time......

post signature 


Related Posts Plugin for WordPress, Blogger...